If you want to print data in Excel you may run into problems from time to time, especially if you want to make sure that all your data fits neatly on one page. It prints on multiple pages instead of one page, which you may find frustrating.
Fortunately, when printing you can adjust your Excel settings to make everything fit on one page and make it look nice. In this guide, we’ll show you step-by-step How to stretch Excel spreadsheet to full page print, so that your data fits neatly on a single page.
Check how many pages print in the Excel Sheet
Before printing your Excel sheet, it’s important to know how many pages it will print. This helps ensure that your data fits nicely and avoids unnecessary paper waste. In Print Preview, you can see page numbers and adjust your spreadsheet, so the printed version looks great.
Below are the steps to use Print Preview to see how your final print job will look:
1. Open the Excel sheet that you want to print.
2. Click on the File tab at the top left of the Excel window, and then choose Print option.
3. In the Print Preview window, you will be able to see how your sheet will appear when you print and how many pages will be printed.
4. You can navigate to pages using the navigation buttons at the bottom of the preview window.
6 Best Ways to Stretch Excel Spreadsheets to Full Page Print
Printing Excel sheets on one page saves you paper and makes your documents look more professional. Here are some simple and effective ways to fit and print your Excel sheet on one page:
Step 1: Adjust Column Widths and Row Heights to Stretch Excel Spreadsheet to Full Page Print
Don’t make your Excel sheet columns too wide. Because the width of the columns directly affects how much data you can print on one page. You can save a lot of paper, simply by reducing the column width.
But how do you know if you’ve reduced the width enough to fit the data on one page? To find out, you can use Excel’s Page Layout View to see how your data will appear on each page.
Here’s how to enter page layout mode and reduce column widths:
1. Click on the View tab from the ribbon.
2. In the Workbook View group, select Page Layout.
3. From here you can reduce the width of the top column to fit your data on one page. You can reduce by clicking and dragging by placing the cursor on the edge of the column heading you want to resize.
Once you have all the data fit on one page, you can go ahead and print it.
Step 2: Adjust the Scaling to Stretch Excel Spreadsheet to Full Page Print
Excel has a built-in option to scale your worksheet to fit rows and columns on one page. When you use it, it shrinks everything to fit all the columns or rows on a page.
Follow the steps below to scale down the worksheet while printing:
1. Click the File > Print.
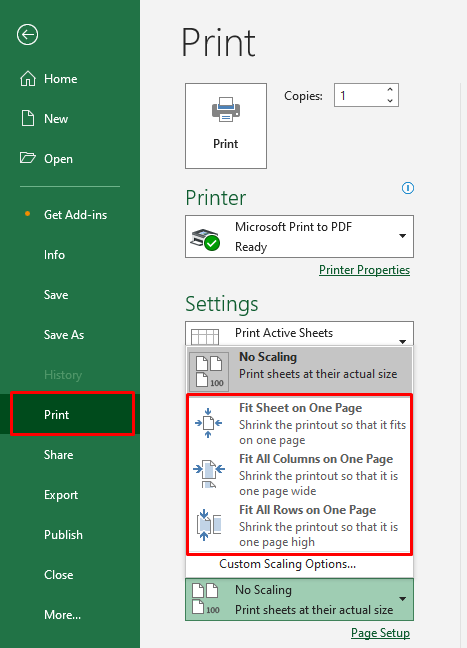
2. Click the Scaling option at the bottom left of the Print window.
3. Click on any one of the options from No Scaling drop down box.
- Fit Sheet on One Page
- Fit All Columns on One Page
- Fit All Rows on One Page
The steps above will scale your sheet to fit the page, which you’ll be able to see how the data will look in the print preview to the right.
Step 3: Change the Page Orientation to Fit and Print Excel Sheet in One Page
You can use the Orientation command to stretch your worksheet to one page. Follow the steps given below:
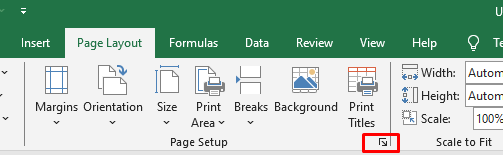
1. Click on the Page Layout tab.
2. In the Page Setup group, click on the Dialog Box Launcher. This will open the dialog box for ‘Page Setup‘.
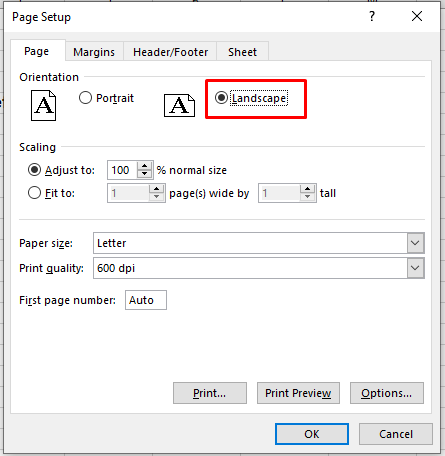
3. Click the Pages tab from the dialog box.
4. In the Orientation option choose the Landscape option to change the page layout from portrait to landscape. Then click OK button.
Now you can go to Print Preview to see how your printed report will look.
You can change the orientation from the Print Preview window, to do this select Landscape Orientation from the drop-down in Settings.
Step 4: Adjust the Page Margins to Stretch Excel Spreadsheet to Full Page Print
Sometimes when printing you may find that a few extra columns or rows end up on a new page. This happens when your data doesn’t fit perfectly on a page.
To fix this, you can use page margin adjustment. which reduces the white space around the edges of your printed page, allowing your data to fit on one page.
Here are the steps to reduce page margins in Excel:
1. Click on the Page Layout tab at the top of the window.
2. In the Page Layout tab, select the Margins option.
3. Here you will see three margin options like ‘Normal,’ ‘Wide’ or ‘Narrow. Now you can change the margin options from Normal to Narrow to reduce the space on your page.
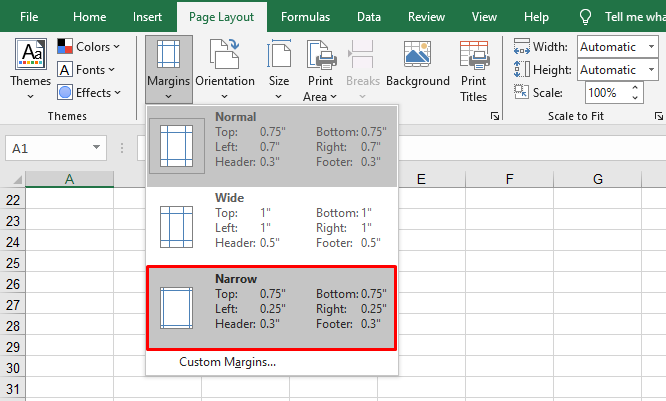
If you want to reduce the page margins further, click on Custom Margins. A dialog box will open where you enter small values for top, bottom, left and right.
Also Read: How to Insert an Excel Spreadsheet Into Google Docs
Step 5: Use Print Area Command to Fit and Print Excel Sheet in One Page
Sometimes you may have a large dataset, and if you want to print selected data from it, you can use the print area command.
To learn how you can quickly print selected data from a worksheet using the Print Area command, follow the steps below:
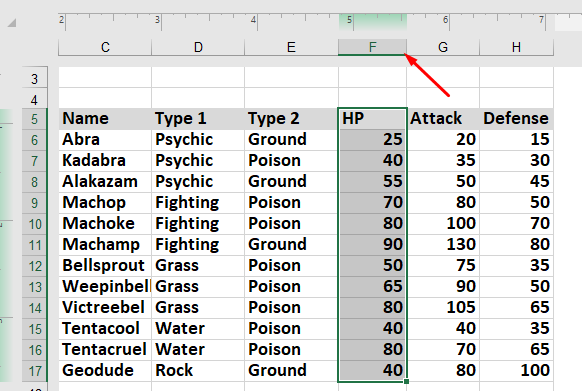
1. Select the cells in your spreadsheet that you want to print.
2. Go to the Page Layout tab in the Excel ribbon.
3. Click the Print Area button and select Set Print Area.
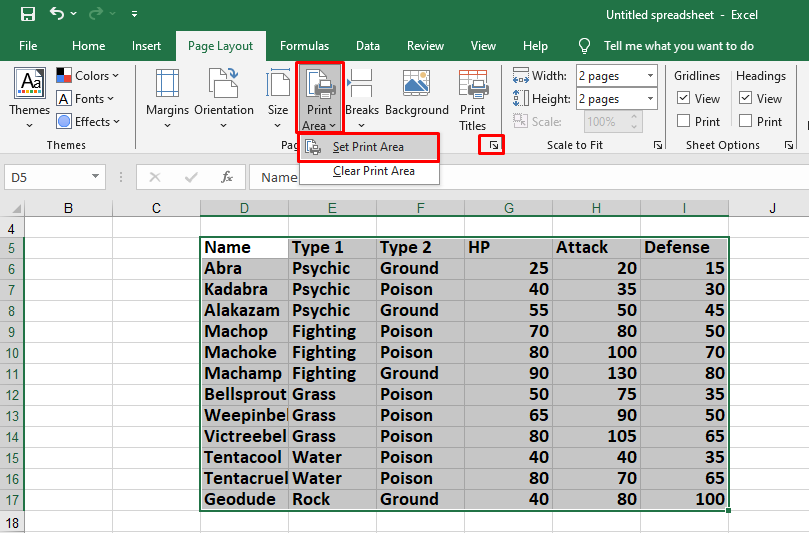
4. Now a dialog box called Page Setup will open. In the Page Setup window, look for the Fit to option.
5. Select the Fit to option and choose the number of wide and tall pages to print your data.
Finally, click on the Print Preview button. This will show you how your printed page will look with your selected print area and fit-to-page settings.
Step 6: Reduce the Font Size to stretch excel spreadsheet to full page print
Another way to fit extra rows and columns on a page is to reduce the font size. This allows you to resize some of the columns in your sheet so that all the data fits on one page when printed.
1. Select the cells you want to print.
2. Then go to the Home tab.
3. Now, click the font size dropdown and choose a smaller font size.
This will help fit all your data on one page when you print it.
Conclusion
It’s easy to expand an Excel spreadsheet to fit an entire page for printing. You can adjust the orientation, scaling and margins using the “Page Setup” function. This will automatically adjust the height to fit, potentially shortening some rows. Always preview your changes in Print Preview before printing your page.
Pingback: How to Unhide and Show Hidden Columns in Excel - Techcary - Tips, Tricks & How-Tos