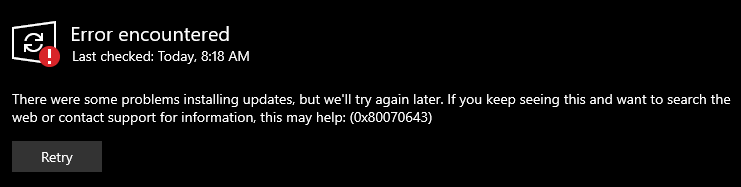
If you are a Windows user, you might see this error code sometime during system update This error code looks like “Windows Update Error 0x80070643.” This error usually occurs when installing or updating Windows software.”
Windows Update Error 0x80070643 Fixing this error may seem challenging, but in this guide, we have provided simple steps to fix this error and make your Windows updates easier. By following these instructions, you can easily fix Windows Update Error 0x80070643 and update Windows anytime without any hassle.
What does the Windows update error 0x80070643 mean?
Windows Update Error 0x80070643 is a common problem that occurs when trying to update or install the Windows operating system. This error means there is a problem with Windows Installer or Windows Update components This can happen for various reasons such as corrupted system files, missing updates, or conflicts with installed programs.
It is important to know what causes this error and how to fix it to keep your system updated By fixing the root problem, you can resolve this error and successfully install your Windows updates.
8 Best Ways to Fix Windows Update Error 0x80070643
Now that you understand why error code 0x80070643 occurs during Windows Update, let’s solve this error, you can try the following steps:
Fix 1: Restart your computer
Sometimes, restarting your computer can resolve temporary issues that may be causing the error Restart your computer and then try running Windows Update again.
Fix 2: Update the .NET Framework
0x80070643 error may be encountered on Windows devices due to .NET framework issues. To fix this, you can repair the corrupt .NET Framework components using a repair utility or download and install the latest .NET version.
- Open a browser and download the .NET Framework Repair Tool from Microsoft.
- Once downloaded, run the tool on your computer. It will scan for any issues with the .NET Framework.
- Follow the on-screen instructions as the repair tool guides you through the repair process. Follow these instructions carefully.
- If the repair tool successfully installed the .NET Framework components, restart your computer
Fix 3: Run Windows Update Troubleshooter
One way to resolve error code 0x80070643 is to use the Windows troubleshooter. This tool checks your computer for any Windows update-related issues.
You can run the Windows Update troubleshooter on your Windows 11 computer by following these steps:
- Press Windows Key + I to open the Settings.
- Go to Update & Security and select Troubleshoot from the left-hand menu.
- Click on Additional troubleshooter.
- Look for Windows Update and click on Run the troubleshooter.
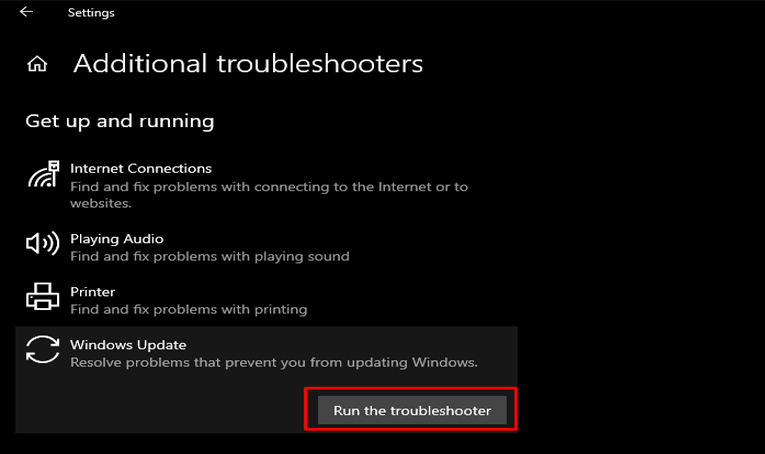
The Windows Update Troubleshooter checks for problems related to Windows Updates and tries to fix them. It detects errors like 0x80070643 and tries to resolve them. Restart your computer after using this Windows Update troubleshooter.
Fix 4: Clean Boot Windows
If you’re experiencing the error, sometimes a third-party app can cause problems with Windows Update. To troubleshoot, do a clean boot of Windows to identify the problem. A clean boot stops startup apps and non-Microsoft services, giving you control.
- Press Win + R, type msconfig, and press Enter.
- In the System Configuration window, go to the Services tab.
- Check “Hide all Microsoft services” and then click on “Disable all.”
After that restart your computer and try updating again.
Fix 5: Reset Windows Update Components
If the above solutions don’t work, you can try resetting the Windows Update components. To do this, open a command prompt and run the commands below:
- Open Command Prompt as an administrator.
- Run the following commands one by one.
net stop wuauserv
net stop cryptSvc
net stop bits
net stop msiserver
ren C:\Windows\SoftwareDistribution SoftwareDistribution.old
ren C:\Windows\System32\catroot2 catroot2.old
net start wuauserv
net start cryptSvc
net start bits
net start msiserver
After running these commands, try installing Windows Update again. This method will solve your error 0x80070643 permanently.
Fix 6: Run SFC Scan
System File Checker (SFC) detects and repairs corrupt files after scanning. If you see Windows Update error code 0x80070643, you can use SFC scan to fix the files. Follow the steps below to resolve this update error.
- Click on Start, search for “Command Prompt,” and choose Run as administrator.
- Type sfc /scannow and press Enter. Let the process complete.
On your Windows computer, after running the SFC scan, it will find the errors and fix them. The SFC scan results will show the following message: “Windows Resource Protection found corrupted files and successfully repaired them.“
After the SFC scan is complete, restart your computer. Hopefully, now your update error will be resolved.
FIX 7: Restart Windows Update Services
If the Windows Update service encounters an error, it can cause the 0x80070643 installation error. You can restart the Windows Update service to see if that fixes the problem.
- Press the W + R to open the Run dialog box.
- Type services.msc and press Enter to open the Services window.
- Scroll down and find the Background Intelligent Transfer Service in the list.
- Repeat the same steps for the Windows Update and Cryptographic Services items, then close the window.
- Wait for the service to restart. Once it’s done, try updating your PC again to see if it works error-free.
Fix 8: Disable Antivirus Software
Sometimes your antivirus or security software can interfere with Windows Update. Temporarily turn off your antivirus software and then run Windows Update again. If this fixes the error, you may need to change your antivirus settings.
FAQ
How do you update Windows 10?
To update your Windows 10, click the Start menu, go to Settings > Update & security, then click Check for updates. If updates are available, they will be downloaded and installed automatically.
How do you update a graphics driver in Windows 10?
To update graphics drivers in Windows 10, right-click the Start menu and select Device Manager. Expand the Display Adapters section, right-click on your graphics card, and select Update Driver. Choose “Search automatically for updated driver softwar and follow the on-screen instructions to complete the update.
How do you turn off Windows 10 updates?
To turn off Windows 10 updates, go to Settings > Update & Security > Windows Update. Click on Advanced options, then under Pause updates, toggle the switch to turn off updates for up to 35 days.
Related Article
Pingback: How to Fix the 0x0 0x0 Error Code on Windows PC - Techcary - Tips, Tricks & How-Tos